
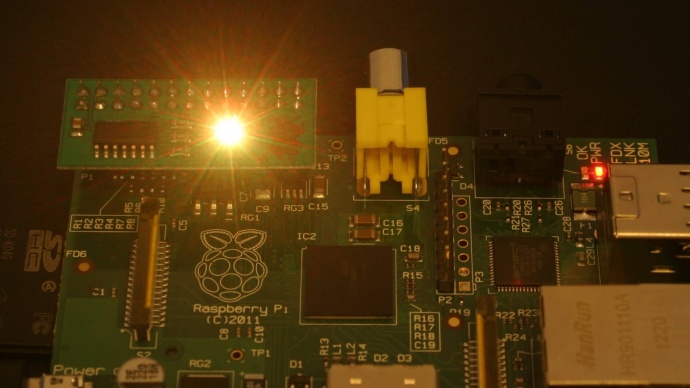
LedBorg - An ultra bright RGB LED add on board for your Raspberry Pi
Lesson plan
Installation of the new LedBorg softwareLesson 1. Our first Python example
Lesson 2. Simplifying the code
Lesson 3. Produce a sequence of colours
Lesson 4. Taking user input
Lesson 5. Brightness levels (PWM)
Lesson 6. A simple dialog (GUI)
Lesson 7. Using a pre-made dialog
Simplifying the code
We have written our first script which can set the LedBorg to a colour, but there are several lines which are very similar in what they make Python to do.Imagine we wanted to change the colour being displayed several times, it would get boring very quickly to type out the same lines of code each time.
What we need is a function.
Starting a new script
We can start a new script easily by re-using the old script, start by copying lesson1.py to lesson2.py:cp lesson1.py lesson2.pyWe now have a second script which is identical to the first.
Open the new script up in a text editor and remove all of the lines from 16 onwards to leave us with the following lines:
#!/usr/bin/env python

# Import the library functions we need
import time
import wiringpi2 as wiringpi
wiringpi.wiringPiSetup()

# Setup the LedBorg GPIO pins
PIN_RED = 0
PIN_GREEN = 2
PIN_BLUE = 3
wiringpi.pinMode(PIN_RED, wiringpi.GPIO.OUTPUT)
wiringpi.pinMode(PIN_GREEN, wiringpi.GPIO.OUTPUT)
wiringpi.pinMode(PIN_BLUE, wiringpi.GPIO.OUTPUT)
Functions
Functions are small sections of the script which other bits of the script can run, usually referred to as calling.Functions are allowed to take input values, like the variables we set before, they may also return values.
If we consider a simple example of adding two numbers together:
def AddNumbers(a, b):
    sum = a + b
    return sum
The first line tells Python that we want a function called AddNumbers which takes two variables, named a and b.
The second line makes another variable, sum, which is given the value of a + b.
The final line sends the value of the sum variable back to wherever the function is called from by using the
return command.Notice how the second and third lines in the function start to the right of the first line, we refer to these lines as being indented.
The indentation tells Python these lines belong to the AddNumbers function.
We will come across indentation again later, the key rule in Python is that all of the lines belonging to the same thing, such as the function above, need to be indented by the same amount.
We will see other areas of code later which also require an indentation.
If we now use this function in another bit of code we can make it run the indented lines, for example:
print '3 + 5 =', AddNumbers(3, 5)will write the following answer to the terminal:
3 + 5 = 8Not all functions have a return statement, as you will see our function which will set the LedBorg colour does not have a result to return.
Setting the LedBorg colour from a function
So back to our script.we want a function which sets the three colours for us, in other words it needs to contain the same lines we used before in lesson 1 to set the LedBorg colour:
# A function to set the LedBorg colours
def SetLedBorg(red, green, blue):
    wiringpi.digitalWrite(PIN_RED, red)
    wiringpi.digitalWrite(PIN_GREEN, green)
    wiringpi.digitalWrite(PIN_BLUE, blue)
Functions are also allowed to call other functions, they also do not need to be passed any variables.For example we can now add another function which turns the LedBorg off when called:
# A function to turn the LedBorg off
def LedBorgOff():
    SetLedBorg(0, 0, 0)
We can now re-write the code we used before in the lesson1.py script to call these new functions instead:# Set the LedBorg colour SetLedBorg(1, 1, 0) print 'LedBorg on' # Wait for the time delay time.sleep(5) # Turn the LedBorg off LedBorgOff() print 'LedBorg off'When we run this script we should get the same effect as the original script; the LedBorg should turn
But we can do even more, why not set each of the colours in turn?
If we change line 26 onwards to the following:
# Settings for the sequence
delay = 2

# Set the LedBorg to red
SetLedBorg(1, 0, 0)
print 'Red'
time.sleep(delay)

# Set the LedBorg to green
SetLedBorg(0, 1, 0)
print 'Green'
time.sleep(delay)

# Set the LedBorg to blue
SetLedBorg(0, 0, 1)
print 'Blue'
time.sleep(delay)

# Set the LedBorg to yellow
SetLedBorg(1, 1, 0)
print 'Yellow'
time.sleep(delay)

# Set the LedBorg to cyan
SetLedBorg(0, 1, 1)
print 'Cyan'
time.sleep(delay)

# Set the LedBorg to magenta
SetLedBorg(1, 0, 1)
print 'Magenta'
time.sleep(delay)

# Set the LedBorg to white
SetLedBorg(1, 1, 1)
print 'White'
time.sleep(delay)

# Turn the LedBorg off
LedBorgOff()
print 'LedBorg off'
Then we cycle through all seven basic colour combinations.
Changing the delay variable on line 27 will speed up or slow down the sequence.
The complete script
The completed script can be downloaded directly to the Raspberry Pi using:wget -O lesson2.py http://www.piborg.org/downloads/ledborg-new/lesson2.txtRemember we make the script executable with:
chmod +x lesson2.pyand run it with:
sudo ./lesson2.py
#!/usr/bin/env python

# Import the library functions we need
import time
import wiringpi2 as wiringpi
wiringpi.wiringPiSetup()

# Setup the LedBorg GPIO pins
PIN_RED = 0
PIN_GREEN = 2
PIN_BLUE = 3
wiringpi.pinMode(PIN_RED, wiringpi.GPIO.OUTPUT)
wiringpi.pinMode(PIN_GREEN, wiringpi.GPIO.OUTPUT)
wiringpi.pinMode(PIN_BLUE, wiringpi.GPIO.OUTPUT)

# A function to set the LedBorg colours
def SetLedBorg(red, green, blue):
    wiringpi.digitalWrite(PIN_RED, red)
    wiringpi.digitalWrite(PIN_GREEN, green)
    wiringpi.digitalWrite(PIN_BLUE, blue)

# A function to turn the LedBorg off
def LedBorgOff():
    SetLedBorg(0, 0, 0)

# Settings for the sequence
delay = 2

# Set the LedBorg to red
SetLedBorg(1, 0, 0)
print 'Red'
time.sleep(delay)

# Set the LedBorg to green
SetLedBorg(0, 1, 0)
print 'Green'
time.sleep(delay)

# Set the LedBorg to blue
SetLedBorg(0, 0, 1)
print 'Blue'
time.sleep(delay)

# Set the LedBorg to yellow
SetLedBorg(1, 1, 0)
print 'Yellow'
time.sleep(delay)

# Set the LedBorg to cyan
SetLedBorg(0, 1, 1)
print 'Cyan'
time.sleep(delay)

# Set the LedBorg to magenta
SetLedBorg(1, 0, 1)
print 'Magenta'
time.sleep(delay)

# Set the LedBorg to white
SetLedBorg(1, 1, 1)
print 'White'
time.sleep(delay)

# Turn the LedBorg off
LedBorgOff()
print 'LedBorg off'
Continue to lesson 3. Produce a sequence of colours