LedBorg - An ultra bright RGB LED add on board for your Raspberry Pi
Lesson plan
Installation of the new LedBorg softwareLesson 1. Our first Python example
Lesson 2. Simplifying the code
Lesson 3. Produce a sequence of colours
Lesson 4. Taking user input
Lesson 5. Brightness levels (PWM)
Lesson 6. A simple dialog (GUI)
Lesson 7. Using a pre-made dialog
Our first Python example
Creating the file
The first thing to do is to create a new Python script which turns the three colours:To start with we will create a directory for our LedBorg scripts to live in:
mkdir ~/ledborgNow we move to this new directory using:
cd ~/ledborgNow that we have a place to put our scripts we need to create a new one in a text editor.
I will use Nano in this example as it is available from the terminal, installed by default on Raspbian, and easy to understand for beginners.
If you have another text editor you prefer such as Leafpad (GUI based, installed with Raspbian), Vim, or Emacs then you can use them instead.
To create a new script file with Nano (we will call it lesson1.py) enter the following command:
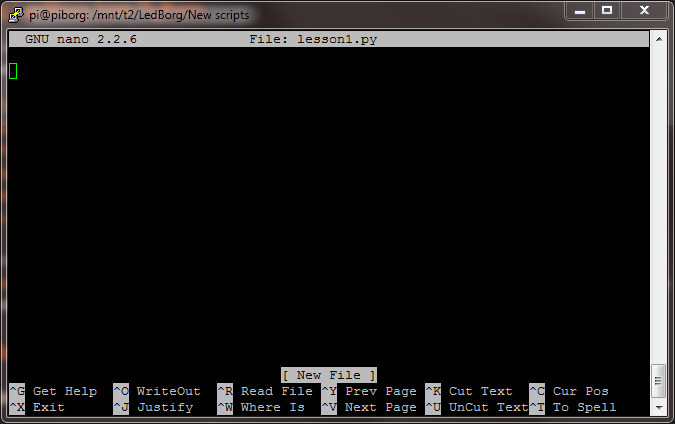
nano lesson1.pyWe are presented with a blank file, ready to write our new script.

Getting the bits we need
The first job is to set some things up we will need for all of our scripts.First we add a line known to the Linux community as a hash-bang:
#!/usr/bin/env pythonAll we need to know about this line is it tells Linux that the file is a Python script.
Linux sees that the file starts with the hash-bang (
In simple terms the
This means the system itself will figure out where Python is, the same way it does if you type the command
Python treats any line starting with a hash (
#!) marker and will use the command specified (/usr/bin/env python) to run this script when we ask it to execute later.In simple terms the
/usr/bin/env program is told to find and use a program named python which will execute the lines in this file.This means the system itself will figure out where Python is, the same way it does if you type the command
python directly into the terminal.Python treats any line starting with a hash (
#) as a comment, in other words Python will ignore this first line.Next we need to add some import statements, these tell Python which libraries the script wishes to use.
We will add a blank line to separate this section for clarity, add a comment to help us remember what these lines do, then import a timing library and the WiringPi2 library:
#!/usr/bin/env python

# Import the library functions we need
import time
import wiringpi2 as wiringpi
wiringpi.wiringPiSetup()
The
as keyword is used to give the wiringpi2 library the name wiringpi, the last line is used to setup the access to the GPIO pins.From now on we will refer to the WiringPi2 library as WiringPi wherever it is used.
Setting up the pins (GPIO)
The header on the Raspberry Pi is collectively known as the General Purpose Input / Output (GPIO) pins.These pins can be controlled by us to in turn control the LedBorg.
Next we need to tell the script which GPIO pins to use:
These settings do not change, so they will need to have fixed values in our script.
Values that do not get changed are typically known as constants.
Conventionally upper case names are used in many programming languages to show values are constants.
After this we tell WiringPi to make the pins behave as outputs, this means we can turn the pins on or off:
# Setup the LedBorg GPIO pins
PIN_RED = 0
PIN_GREEN = 2
PIN_BLUE = 3
wiringpi.pinMode(PIN_RED, wiringpi.GPIO.OUTPUT)
wiringpi.pinMode(PIN_GREEN, wiringpi.GPIO.OUTPUT)
wiringpi.pinMode(PIN_BLUE, wiringpi.GPIO.OUTPUT)
Controlling the LedBorg
Now that we have our pins setup we can do something with them.In scripts we often want to give names to values which can be changed while the script is running.
Values which may be changed are typically known as variables.
We will use mostly lower case names for variables, other people may choose a different convention.
We will set four variables, one for each channel and one for time:
# Set the colour channels (1 is on, 0 is off) and the time delay in seconds
red = 1
green = 1
blue = 0
delay = 5
So we know what we want to do, now we need to make the script do the work.
We set the colour channels to the values set above using the
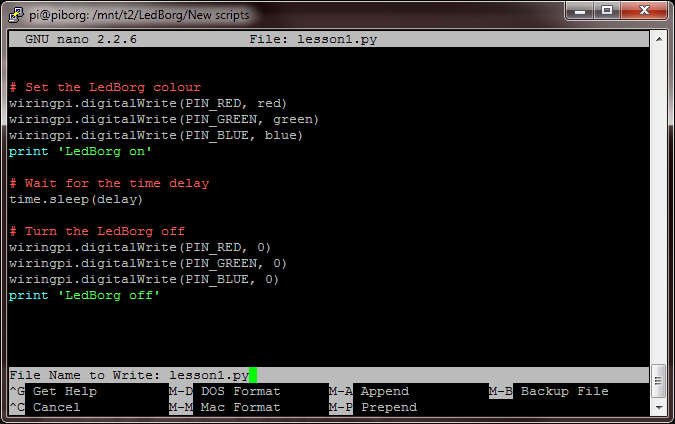
wiringpi.digitalWrite function, use the time.sleep function to wait for the delay time and then set all three channels off (0):# Set the LedBorg colour wiringpi.digitalWrite(PIN_RED, red) wiringpi.digitalWrite(PIN_GREEN, green) wiringpi.digitalWrite(PIN_BLUE, blue) print 'LedBorg on' # Wait for the time delay time.sleep(delay) # Turn the LedBorg off wiringpi.digitalWrite(PIN_RED, 0) wiringpi.digitalWrite(PIN_GREEN, 0) wiringpi.digitalWrite(PIN_BLUE, 0) print 'LedBorg off'
The
print commands tell Python to write text on to the terminal.Running the script
We have now finished writing the script, you need to save the file and may close the editor.If you used Nano do this by pressing CTRL+O, ENTER to save followed by CTRL+X to quit.

Next we need to tell Linux the script is allowed to be run, also known as executing.
We do this with the
chmod command as follows:chmod +x lesson1.pyWe can now run the script, we do this by using
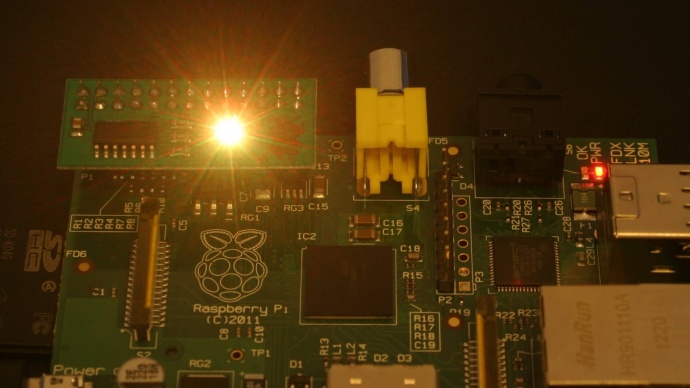
sudo ./ followed by the script name:sudo ./lesson1.pyThe LedBorg should turn

We use
sudo to get permission to tell the GPIO pins what to do, we use ./ to tell Linux that this script we wish to run is in the current directory.We could also use:
sudo ~/ledborg/lesson1.pywhich tells Linux the script is in the
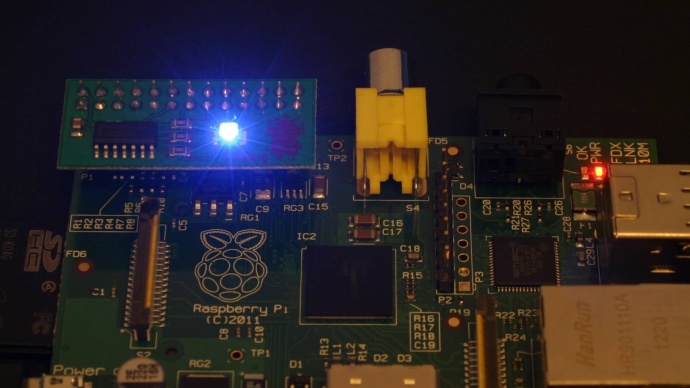
~/ledborg directory, then we can change directory and the command would still work.Now you have a working script you can change the settings (lines 17 to 20) to produce different colours, for example:
wiringpi.pinMode(PIN_GREEN, wiringpi.GPIO.OUTPUT)
wiringpi.pinMode(PIN_BLUE, wiringpi.GPIO.OUTPUT)

# Set the colour channels (1 is on, 0 is off) and the time delay in seconds
red = 0
green = 0
blue = 1
delay = 2

# Set the LedBorg colour
wiringpi.digitalWrite(PIN_RED, red)
will show

The complete script
The completed script can be downloaded directly to the Raspberry Pi using:wget -O lesson1.py http://www.piborg.org/downloads/ledborg-new/lesson1.txt#!/usr/bin/env python # Import the library functions we need import time import wiringpi2 as wiringpi wiringpi.wiringPiSetup() # Setup the LedBorg GPIO pins PIN_RED = 0 PIN_GREEN = 2 PIN_BLUE = 3 wiringpi.pinMode(PIN_RED, wiringpi.GPIO.OUTPUT) wiringpi.pinMode(PIN_GREEN, wiringpi.GPIO.OUTPUT) wiringpi.pinMode(PIN_BLUE, wiringpi.GPIO.OUTPUT) # Set the colour channels (1 is on, 0 is off) and the time delay in seconds red = 1 green = 1 blue = 0 delay = 5 # Set the LedBorg colour wiringpi.digitalWrite(PIN_RED, red) wiringpi.digitalWrite(PIN_GREEN, green) wiringpi.digitalWrite(PIN_BLUE, blue) print 'LedBorg on' # Wait for the time delay time.sleep(delay) # Turn the LedBorg off wiringpi.digitalWrite(PIN_RED, 0) wiringpi.digitalWrite(PIN_GREEN, 0) wiringpi.digitalWrite(PIN_BLUE, 0) print 'LedBorg off'
Continue to lesson 2. Simplifying the code


