
Installation Issues

Forums:
Post here for queries regarding setup problems.
We recommend you try using the troubleshooting instructions here first if you have not already.
Please try to list as much about the problem as you can (OS distribution, versions, motor setup et cetera), the more we know the easier it is to help :)
- Log in to post comments

DcShadow
Wed, 02/11/2015 - 10:10
Permalink
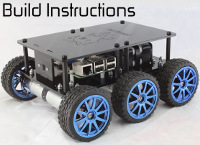
DiddyBorg and rPi 2 (continued...)
Got the cables and key - thanks!
I've started a new thread regarding my issues as I think it may be Pi2 related (https://www.piborg.org/comment/694#comment-694) do you want me to continue the convo there or in here?
piborg
Wed, 02/11/2015 - 10:37
Permalink
DiddyBorg with RPi v2
The PicoBorg Reverse and DiddyBorg are both compatible with the Raspberry Pi v2, we have tested them both.
I have added a more complete listing of what we did to setup the Raspberry Pi v2 to run DiddyBorg on the other thread:
https://www.piborg.org/comment/696#comment-696
E0177
Fri, 02/27/2015 - 13:39
Permalink
I have now this kind of probl
I have now this kind of problem.
pi@carPI ~/diddyborg $ ./ps3DiddyJoy.sh
sixad is already running.
run '/usr/bin/sixad --stop' to stop it
Traceback (most recent call last):
File "/home/pi/diddyborg/diddyJoy.py", line 9, in
import PicoBorgRev
File "/home/pi/diddyborg/PicoBorgRev.py", line 14
SyntaxError: Non-ASCII character '\xb2' in file /home/pi/diddyborg/PicoBorgRev.py on line 15, but no encoding declared; see http://www.python.org/peps/pep-0263.html for details
piborg
Fri, 02/27/2015 - 15:18
Permalink
SyntaxError: Non-ASCII character '\xb2' in file
It sounds like the PicoBorgRev.py file has been altered or corrupted in some fashion.
The second line of the file should be:
# coding: latin-1which declares the file encoding.
The character it mentions is the
²symbol, which it cannot understand without the encoding.You could try adding the coding line back in to the file so that the first few lines of the file read:
Alternatively you can re-install the DiddyBorg software.
This can be done as follows:
E0177
Fri, 02/27/2015 - 19:42
Permalink
now I do have this kind probl
now I do have this kind problem
sixad is already running.
run '/usr/bin/sixad --stop' to stop it
Loading PicoBorg Reverse on bus 0, address 44
Traceback (most recent call last):
File "/home/pi/diddyborg/diddyJoy.py", line 17, in
PBR.Init()
File "/home/pi/diddyborg/PicoBorgRev.py", line 234, in Init
self.bus = smbus.SMBus(self.busNumber)
IOError: [Errno 2] No such file or directory
piborg
Sat, 02/28/2015 - 08:16
Permalink
Try the other I2C bus
I think this is because the scripts are trying to use the wrong I2C bus for your Raspberry Pi.
By default the scripts try looking for the PicoBorg Reverse on
i2c-1, then if they cannot find it they tryi2c-0.Try changing line 194 in
PicoBorgRev.pyto be:This should make the script try
i2c-0beforei2c-1.Since all of the examples use
PicoBorgRev.pyit should fix all of them.E0177
Sat, 02/28/2015 - 09:40
Permalink
That didn't work. It still sa
That didn't work. It still same message
piborg
Sat, 02/28/2015 - 21:53
Permalink
That is strange
That is strange...
Looking at the error you posted more carefully it looks like that value was already set to
0.Could you try setting it back to
1if you have not already?If that does not work could you run the following command:
ls /devand post the results.
E0177
Sun, 03/01/2015 - 14:24
Permalink
that's what it printed on the
that's what it printed on the screen
piborg
Sun, 03/01/2015 - 19:39
Permalink
i2c-1 is listed, but not i2c-0
i2c-1is listed, but noti2c-0.I think you need to change the bus selection line (194) back to using bus 1:
This should make the script try
i2c-1beforei2c-0.This is the default setting after installation and is correct for most Raspberry Pis.
E0177
Sun, 03/01/2015 - 20:55
Permalink
then it print this on the scr
then it print this on the screen
sixad is already running. run '/usr/bin/sixad --stop' to stop it Loading PicoBorg Reverse on bus 1, address 44 Missing PicoBorg Reverse at 44 PicoBorg Reverse was not found Trying bus 0 instead Loading PicoBorg Reverse on bus 0, address 44 Traceback (most recent call last): File "/home/pi/diddyborg/diddyJoy.py", line 17, in PBR.Init() File "/home/pi/diddyborg/PicoBorgRev.py", line 264, in Init self.Init(False) File "/home/pi/diddyborg/PicoBorgRev.py", line 234, in Init self.bus = smbus.SMBus(self.busNumber) IOError: [Errno 2] No such file or directorypiborg
Sun, 03/01/2015 - 23:46
Permalink
I2C not setup
It sounds like the I2C is not correctly setup.
Could you try enabling the I2C using
raspi-configas described here:https://www.piborg.org/comment/688#comment-688
E0177
Mon, 03/02/2015 - 09:18
Permalink
It didn't help
It didn't help
piborg
Mon, 03/02/2015 - 11:12
Permalink
Changes made?
Since the I2C bus number has changed between the last time you had this working and now I am guessing that you have done one of the following recently::
Could you tell us what was changed before the problems occurred?
The more information you can tell us the quicker we can get your robot working again ^_^
E0177
Mon, 03/02/2015 - 11:20
Permalink
I Have updated raspbian and c
I Have updated raspbian and changed raspberry pi
piborg
Mon, 03/02/2015 - 12:00
Permalink
Wiring
The most likely explanation is that the wires are not connecting with the PicoBorg Reverse properly.
Could you try the following:
sudo i2cdetect -y 1and show us the resultFor PicoBorg Reverse: see the diagram below the connections heading.
For DiddyBorg: see Step 44 - First cable attached to the PicoBorg Reverse to Step 49 - Checking the cable connections
E0177
Mon, 03/02/2015 - 12:20
Permalink
that's the result 0 1
that's the result
0 1 2 3 4 5 6 7 8 9 a b c d e f
00: -- -- -- -- -- -- -- -- -- -- -- -- --
10: -- -- -- -- -- -- -- -- -- -- -- -- -- -- -- --
20: -- -- -- -- -- -- -- -- -- -- -- -- -- -- -- --
30: -- -- -- -- -- -- -- -- -- -- -- -- -- -- -- --
40: -- -- -- -- -- -- -- -- -- -- -- -- -- -- -- --
50: -- -- -- -- -- -- -- -- -- -- -- -- -- -- -- --
60: -- -- -- -- -- -- -- -- -- -- -- -- -- -- -- --
70: -- -- -- -- -- -- -- --
wiring is correct and I took pictures too.
piborg
Tue, 03/03/2015 - 09:57
Permalink
Hmm
So the only problem is that the board does not show up on the I2C bus at all...
We also know the board was working with the previous Raspberry Pi.
Does the LED on the PicoBorg Reverse come on briefly when you connect power to the Raspberry Pi?
If you now have a Raspberry Pi 2 then you should download the new SD card image as stated here: http://www.raspberrypi.org/raspberry-pi-2-on-sale/
You can grab the latest Raspbian image here: http://www.raspberrypi.org/downloads/
Then re-install the PicoBorg Reverse software and try again.
E0177
Tue, 03/03/2015 - 10:32
Permalink
it does come on briefly and I
it does come on briefly and I don't have raspberry pi 2
piborg
Tue, 03/03/2015 - 10:57
Permalink
Does it still work with the old Raspberry Pi?
Could you try connecting the PicoBorg Reverse to the old Raspberry Pi and running these two commands:
sudo i2cdetect -y 0sudo i2cdetect -y 1E0177
Tue, 03/03/2015 - 11:13
Permalink
sudo i2cdetect -y 0 print thi
sudo i2cdetect -y 0 print this on the screen
0 1 2 3 4 5 6 7 8 9 a b c d e f
00: -- -- -- -- -- -- -- -- -- -- -- -- --
10: -- -- -- -- -- -- -- -- -- -- -- -- -- -- -- --
20: -- -- -- -- -- -- -- -- -- -- -- -- -- -- -- --
30: -- -- -- -- -- -- -- -- -- -- -- -- -- -- -- --
40: -- -- -- -- -- -- -- -- -- -- -- -- -- -- -- --
50: -- -- -- -- -- -- -- -- -- -- -- -- -- -- -- --
60: -- -- -- -- -- -- -- -- -- -- -- -- -- -- -- --
70: -- -- -- -- -- -- -- --
and sudo i2cdetect -y 1 print this on the screen
Error: Could not open file `/dev/i2c-1' or `/dev/i2c/1': No such file or directory
piborg
Tue, 03/03/2015 - 11:29
Permalink
Not working anymore
It seems like the board is not working on either Raspberry Pi at this point.
Since the LED comes on the board is loading correctly, it should be ready when the LED has turned on and off again.
The most likely explanation is that the cables are not connecting properly, meaning the I2C communications do not work as intended.
I think the best solution is for us to send you out some new cables to replace the current pair.
Could you please use the contact form to tell us what address to ship the replacement cables to?
leechpool
Tue, 03/10/2015 - 10:38
Permalink
minimum connections
Hi,
I have two PicoBorg Reverse I'm using to build a web-controlled robot.
The installation guidance shows two 3-way connectors between raspberry pi and picoborg reverse i.e. 6 connections in all. My question is, are all 6 connections necessary? I apprecaite that if you are using the "daisy chain" connection then anything you are trying to connect to has to be connected to the raspberry pi. But what if you only have PicoBorg Reverse and Raspberry Pi....do you still need all 6 connections?
thanks
Roger
piborg
Tue, 03/10/2015 - 11:09
Permalink
Minimum GPIO Connections from Raspberry Pi
You do not actually require all six connections for PicoBorg Reverse.
The only connections you need are:
3v3 and Ground are used for powering the on-board control chip.
SDA and SCL are used for the I²C communications.
I have attached a diagram below to show the connections.
As long as the daisy chain connector is either unused or connected to a PicoBorg Reverse there should be no need to connect pins 2 and 4.
leechpool
Tue, 03/10/2015 - 16:42
Permalink
Hi, thanks for the quick resp
Hi,
thanks for the quick response.
Roger
E0177
Wed, 03/25/2015 - 17:02
Permalink
those wires you send dindn't
those wires you send dindn't help. but I notised one spot on picoborg reverse what doesn't have that green staff. I was thinking if that spot happens something what couse failure in picoborg reverse. here's picture of it.
piborg
Thu, 03/26/2015 - 10:19
Permalink
Cannot see board on I2C
If you are referring to the red triangle next to the 5-pin header, it is intentional.
The triangle marks which pin on the 5-pin header is pin 1.
Now that we are sure this is definitely not a cable problem, there are only two remaining possibilities I can think of which explain the problem:
If you could try the following to see if software is the problem:
Do not install any other software
sudo i2cdetect -y 0sudo i2cdetect -y 1E0177
Thu, 03/26/2015 - 15:30
Permalink
same result as last time
same result as last time
piborg
Thu, 03/26/2015 - 16:12
Permalink
Faulty PicoBorg Reverse
In that case the most likely explanation is that the PicoBorg Reverse is actually faulty.
If you could send us back the faulty board and we will send you out a replacement.
I have sent you an email to give you our address and check we have the correct address for you.
Apologies for how long this has taken to solve.
E0177
Thu, 03/26/2015 - 21:28
Permalink
I send it soon as possible an
I send it soon as possible and you can use same address what was used on those wires.
Preeyen
Thu, 04/16/2015 - 12:59
Permalink
PicoBorgRev giving me the same issues
Scanning I▒C bus #1
No PicoBorg Reverse boards found, is bus #1 correct (should be 0 for Rev 1, 1 for Rev 2)
Loading PicoBorg Reverse on bus 1, address 44
Missing PicoBorg Reverse at 44
PicoBorg Reverse was not found
Trying bus 0 instead
Loading PicoBorg Reverse on bus 0, address 44
Traceback (most recent call last):
File "Pico.py", line 14, in
PBR.Init() # Setup the board
File "/home/pi/picoborgrev/PicoBorgRev.py", line 264, in Init
self.Init(False)
File "/home/pi/picoborgrev/PicoBorgRev.py", line 234, in Init
self.bus = smbus.SMBus(self.busNumber)
IOError: [Errno 2] No such file or directory
Preeyen
Thu, 04/16/2015 - 13:59
Permalink
I have since connected it up
I have since connected it up to a diffrent pi and it seems to work fine. i need it to work with my pi lol, help me out? i've tried following the above but no luck. shall i reinstall raspbian?
piborg
Thu, 04/16/2015 - 19:18
Permalink
Raspberry Pi versions
Have you tried enabling I2C in
raspi-config, you can do this using these instructions:sudo raspi-config8 Advanced Optionsand press ENTERA7 I2Cand press ENTERYesis highlighted and press ENTERYesis highlighted again and press ENTERFinishis highlighted, then press ENTERIf this is an older Raspberry Pi (such as a B rev 1) you might need to change the I2C bus in the
PicoBorgRev.pyscript.You will find this file in
~/picoborgrev, if you have a DiddyBorg it also needs to be changed in~/diddyborg.The line you want to change is line 194 in
PicoBorgRev.pyso that it reads:If the line already uses
0then try1instead.Preeyen
Thu, 04/16/2015 - 21:36
Permalink
ok so i got the board working
ok so i got the board working, but now after running and testing, the board has stopped outptting power to the motor. i can confirm it is the picoborg and not the motor as i tested it with another picoborg and it worked fine. is there a fix? i have run the code suggested in the troubleshooting section and i am getting 2 False outputs. EDIT: it is the right side Motor1 output that has stopped working..
piborg
Thu, 04/16/2015 - 21:33
Permalink
Interesting
Does either motor move if you run the following:
It is possible that your battery supply is too close to the 6v minimum power requirement.
The PicoBorg Reverse has on-board protection which turns the motors off in the event the power is too low.
Some boards can be a bit more sensitive then others.
If you are using rechargeable AAs then you should use a minimum of 5 batteries, we would recommend at least 6.
Also if you are using any kind rechargeable batteries it may be they are getting a bit flat, try charging them fully and see if the problem is resolved.
Preeyen
Fri, 04/17/2015 - 12:57
Permalink
hey thanks for the reply, you
hey thanks for the reply, you've solved it! i was supplying the motor will ~6V, upped the voltage to 9V and the issue is resolved.
E0177
Mon, 05/18/2015 - 15:42
Permalink
becouse that new board you se
becouse that new board you send didn't solve that problem I have I've been thinking is it possible that if I've been wiring those jumper wires wrong and put power on and it have been hurting those I2c pins? if that is possible how can I test those pins?
piborg
Tue, 05/19/2015 - 11:52
Permalink
Checking GPIO pins
We did receive the original board you sent back, it seems to be completely fine.
It is possible that having swapped over cables would cause the BattBorg to push 5v to both the 3v3 line and one of the serial lines, causing damage.
Alternatively if you are not using a BattBorg you may have damaged one of the serial lines by connecting it to ground with swapped cables.
It does seem likely the Raspberry Pi has a problem at this stage, so testing the GPIO pins would be a good idea.
If you have any LEDs and resistors you can do this by testing you can control each pin manually.
First disconnect anything attached to the GPIO.
Next wire up an LED & resistor between the 3v3 and a ground pin, this should turn on when the Raspberry Pi is powered.
If that is working attach the LED & resistor between a GPIO pin and ground, you will want to test pin 3 (SDA) and pin 5 (SCL).
Use some software to change the output value of the GPIO pin, you should be able to control the LED if all is well.
You can see the GPIO pin layout here: http://pi.gadgetoid.com/pinout
This guide is good for attaching LEDs: https://projects.drogon.net/raspberry-pi/gpio-examples/tux-crossing/gpio...
E0177
Tue, 05/19/2015 - 19:45
Permalink
I used some python code for l
I used some python code for leds it give this as output
led.py:3: RuntimeWarning: This channel is already in use, continuing anyway. Use GPIO.setwarnings(False) to disable warnings.
GPIO.setup(3, GPIO.OUT)
led.py:3: RuntimeWarning: A physical pull up resistor is fitted on this channel!
GPIO.setup(3, GPIO.OUT)
Traceback (most recent call last):
File "led.py", line 5, in
GPIO.setup(2, GPIO.OUT)
ValueError: The channel sent is invalid on a Raspberry Pi
piborg
Wed, 05/20/2015 - 10:47
Permalink
Python to test I2C pins
I think this is probably due to the different pin numbers used with the Raspberry Pi.
Try this python code for toggling both the pins:
import time import wiringpi2 as wiringpi wiringpi.wiringPiSetup() PIN_SDA = 8 PIN_SCL = 9 wiringpi.pinMode(PIN_SDA, wiringpi.GPIO.OUTPUT) wiringpi.pinMode(PIN_SCL, wiringpi.GPIO.OUTPUT) print 'Press CTRL+C to exit' while True: wiringpi.digitalWrite(PIN_SDA, 1) wiringpi.digitalWrite(PIN_SCL, 1) print 'LEDs ON' time.sleep(1) wiringpi.digitalWrite(PIN_SDA, 0) wiringpi.digitalWrite(PIN_SCL, 0) print 'LEDs OFF' time.sleep(1)E0177
Wed, 05/20/2015 - 20:58
Permalink
it give this message and that
it give this message and that SDA pin is on when I power raspberry pi
Traceback (most recent call last):
File "led2.py", line 2, in
import wiringpi2 as wiringpi
ImportError: No module named wiringpi2
piborg
Wed, 05/20/2015 - 21:19
Permalink
WiringPi 2 not installed
You can install WiringPi 2 using these commands:
Then the script should work as intended.
E0177
Wed, 05/20/2015 - 21:56
Permalink
SDA pin works correctly but S
SDA pin works correctly but SCL pin have only dim light on it
piborg
Thu, 05/21/2015 - 10:01
Permalink
SCL pin may be broken
It sounds like the SCL pin may be damaged then.
E0177
Thu, 05/21/2015 - 19:12
Permalink
well I believe that I have to
well I believe that I have to buy new raspberry pi and thanks for the help
koen01
Mon, 05/25/2015 - 20:24
Permalink
DC motor from electronic screwdriver won't run
Hi, when i connect a 3.6v DC engine with gearbox to the picoborg reverse it won't run. The motor makes some sort of whining/hissing noise, but won't turn. I tried a 9v battery, 6v (4x1.5 AA) and a 12v 1.25 amp power supply but it won't turn.
When i connect the 3.6v li-on accu, 9v or 6v battery directly to the motor it turns....i didn't run it for long afraid of burning out the motor.
Another DC motor runs without issue on the same picoborg reverse.
But i want to use the screwdriver engine because of the gears and high torc... (i want to lift a chickencoop door with it)
it this at all possible? i have no specs of the screwdriver engine, other than that is says 3.6v on the outside.
The accu in the screwdriver is 1100mah according to internet..it's this screwdriver.
(https://www.conrad.nl/nl/black-decker-kc460ln-accu-schroevendraaier-5798...)
piborg
Wed, 05/27/2015 - 11:19
Permalink
Motor with electronics.
Based on the description of the problem I am guessing there is a small amount of control electronics within the motor / gearbox assembly.
This is a common practice if they are using a brush-less DC motor (BLDC) and want to simply connect a + and - connection to it.
I am assuming that the other DC motor is just a simple motor with no gearbox assembly.
Some pictures of both motors and how they are connected would help clarify if I am correct or mistaken.
The way PicoBorg Reverse controls speed is to turn the output on and off at high speed, a technique known as PWM.
With a conventional DC motor the voltage gets smoothed out to a steady level and turns as though the average voltage was applied.
If this motor does have electronics inside it then using PWM presents a problem.
What now happens is that the electronics in the motor draw their power from the output, which is regularly turned off.
The electronics in the motor turning on and off at about 8 KHz is then causing the audible buzzing instead of rotating the motor.
There are two possible ways we can try and work around this, assuming the PWM itself is the issue.
Method 1 - other connections
If there are any connections other than the + and - to the motor it may be possible to connect the motor in a way that will behave as intended.
This will depend entirely on what connections are available.
Method 2 - smooth the voltage
Instead of relying on the motor to smooth out the voltage we can perform the smoothing externally.
This page explains PWM in more detail, and how you can use a resistor and capacitor to smooth out the voltage:
http://provideyourown.com/2011/analogwrite-convert-pwm-to-voltage/
I think a resistor between 1 and 10 KΩ and a capacitor around 1.0 μF should work well enough.
Be sure the capacitor can handle the full battery voltage.
Finally make sure you connect the capacitor the right way around, otherwise it may blow up!
ahammernes
Tue, 06/09/2015 - 09:04
Permalink
Flashing led
I have three picobrogreverse, and two of them are working just fine. i setup all three induvidialy, and
but after connecting all three to gether in the daisyt chain one of the cards will not be detected and the led on that board just flashes rapidly. Any ide whats happening ?
piborg
Tue, 06/09/2015 - 09:22
Permalink
Flashing LED & not detected
I am guessing the board that will not detect is the last one in the daisy chain, is that correct?
The most likely explanation is the problem board is not getting enough power.
This causes the board to continually attempt a restart, and each time it starts the LED blinks once.
There are a few possible solutions, depending on what you have available:
DO NOT power the Raspberry Pi from the USB connector at the same time!
For example using a TriBorg all three boards could be connected directly to the TriBorg instead of daisy-chaining them
sebi82ne
Sun, 08/16/2015 - 06:49
Permalink
DiddyBorg Metal Edition the motors not run
i have the diddyborg metal edition with rpi2, if i start the metalSequence.py over SSH, is the board found but the motors are not running and the script stopped...
pi@raspberrypi ~/metalborg $ ./metalSequence.py
Loading PicoBorg Reverse on bus 1, address 44
Found PicoBorg Reverse at 44
PicoBorg Reverse loaded on bus 1
pi@raspberrypi ~/metalborg $ cd
pi@raspberrypi ~ $ lsmod
Module Size Used by
i2c_dev 6027 0
snd_bcm2835 18649 0
snd_pcm 73475 1 snd_bcm2835
snd_seq 53078 0
snd_seq_device 5628 1 snd_seq
snd_timer 17784 2 snd_pcm,snd_seq
snd 51038 5 snd_bcm2835,snd_timer,snd_pcm,snd_seq,snd_seq_device
8192cu 528365 0
i2c_bcm2708 4990 0
uio_pdrv_genirq 2958 0
uio 8119 1 uio_pdrv_genirq
pi@raspberrypi ~ $ i2cdetect -y 1
0 1 2 3 4 5 6 7 8 9 a b c d e f
00: -- -- -- -- -- -- -- -- -- -- -- -- --
10: -- -- -- -- -- -- -- -- -- -- -- -- -- -- -- --
20: -- -- -- -- -- -- -- -- -- -- -- -- -- -- -- --
30: -- -- -- -- -- -- -- -- -- -- -- -- -- -- -- --
40: -- -- -- -- 44 -- -- -- -- -- -- -- -- -- -- --
50: -- -- -- -- -- -- -- -- -- -- -- -- -- -- -- --
60: -- -- -- -- -- -- -- -- -- -- -- -- -- -- -- --
70: -- -- -- -- -- -- -- --
pi@raspberrypi ~ $
what am I doing wrong?
Pages