PlayStation 3 controller help sheet
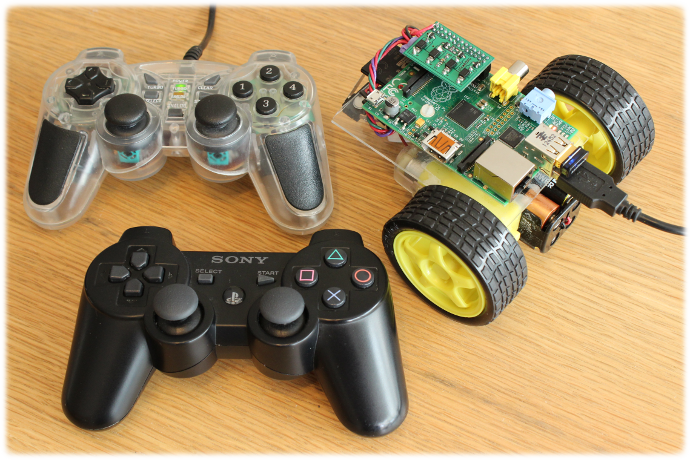
If you wish to use a PlayStation 3 controller to control your Raspberry Pi robots then here are some details which may help.

Check out our How to connect a PS3 remote to the new Raspberry Pi Zero W guide to get setup with the GUI :)
Alternatively keep reading the Jessie instructions below to setup your PS3 controller from a terminal instead.
Our guide here is heavily based on BaseBot's Playstation 3 Controller guide with some slight adjustments to work with a clean install of Jessie Lite and our scripts.
We need to download some packages to allow us to use both the Bluetooth and joystick functions:
Plug the controller into the Raspberry Pi with the USB cable and the Bluetooth dongle if you have not already.
We will also restart the Raspberry Pi to ensure the Bluetooth service is running:
Now disconnect the controller from the USB cable.
Next we start the Bluetooth configuration tool and set the dongle so it can be seen by the controller:
Now you can press the PS button on the controller and it should attempt to talk to the Raspberry Pi.
You should see some log lines like this at a regular interval:
In this example it is
With this we can attempt to make contact with the controller.
We need to use the
This may take several attempts, you can repeat the command using ? then ENTER.
When it works you should see something like this:
Once we have seen the UUID values we can use the
Use the
The LEDs should briefly flash, then just one LED should remain lit.
You can then use the following command to list the connected joysticks:
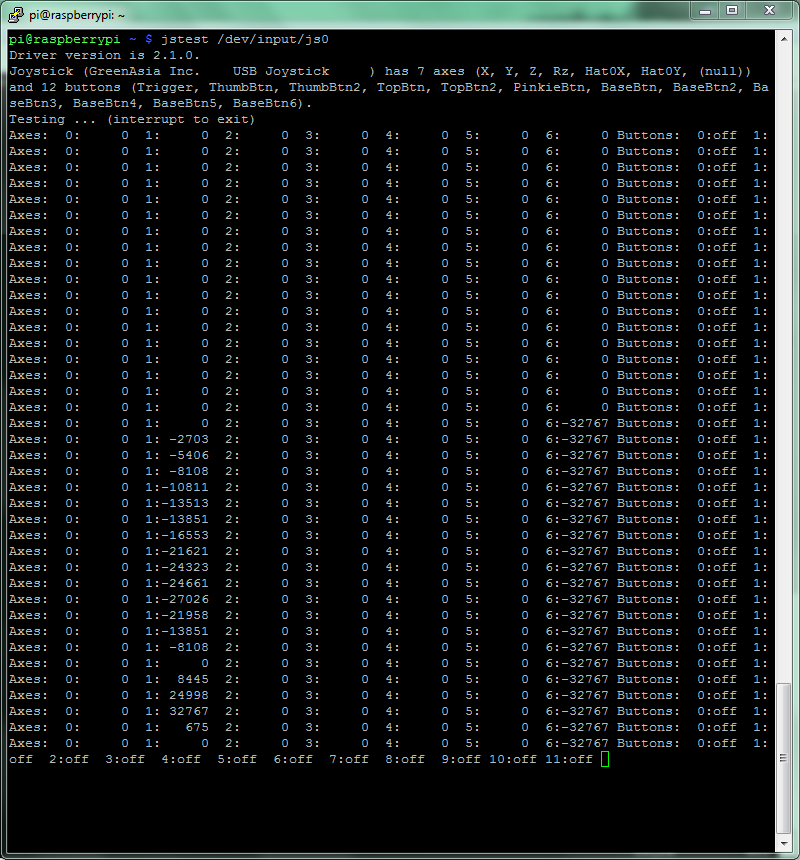
Finally you can test the PS3 controller is working using the device name from the last command with
Next you will need to setup some software to talk with the PS3 controller, we recommend using QtSixA, also known as sixad.
In order to set QtSixA up properly we recommend following this guide by Raspians.
Alternatively the following commands should download all of the necessary software:
Note that the controller may not vibrate with certain versions of Raspbian, if it does not vibrate when you reach the
You can press CTRL+C to finish either of the above instructions, the PS3 controller will remain connected if it has been connected successfully.
If you wiggle one of the analogue sticks up and down you should see output like:

The table below shows each control with the associated index numbers for behaviour as a button (on or off) and as an axes (numeric position).
Any box filled with
For left / right movement of sticks the value read is
For up / down movement of sticks the value read is
For buttons / D-Pad with an axis index reading as an axis returns
If you are not seeing any axis readings for the buttons or the tilt function it is probably because the QtSixA program has not been left running, the best way to start it from a terminal is:
The "

Setup for the Pi Zero W and Raspbian running Pixel
If you are using a version of Raspbian which is running Pixel then you can setup the PS3 controller using the GUI. If you have a Pi 3 or Pi Zero W then you already have the Bluetooth built-in to the board, otherwise you will need a USB Bluetooth dongle.Check out our How to connect a PS3 remote to the new Raspberry Pi Zero W guide to get setup with the GUI :)
Alternatively keep reading the Jessie instructions below to setup your PS3 controller from a terminal instead.
Setup for Jessie and Jessie Lite
First you need to get yourself a USB Bluetooth dongle for the Raspberry Pi and you will need a USB mini cable, the same type you use to charge the PS3 controller.Our guide here is heavily based on BaseBot's Playstation 3 Controller guide with some slight adjustments to work with a clean install of Jessie Lite and our scripts.
We need to download some packages to allow us to use both the Bluetooth and joystick functions:
sudo apt-get -y install libusb-dev joystick python-pygame
cd ~
wget http://www.pabr.org/sixlinux/sixpair.c
gcc -o sixpair sixpair.c -lusb
Next we need to tell the PS3 controller it is meant to be connecting to the Raspberry Pi.
Plug the controller into the Raspberry Pi with the USB cable and the Bluetooth dongle if you have not already.
We will also restart the Raspberry Pi to ensure the Bluetooth service is running:
sudo reboot
sudo ~/sixpair
The
sixpair code should re-configure the controller to talk with the dongle, if it worked you should see something like:
Current Bluetooth master: 00:15:83:0c:bf:eb
Setting master bd_addr to 00:15:83:0c:bf:eb
displayed on the terminal.
Now disconnect the controller from the USB cable.
Next we start the Bluetooth configuration tool and set the dongle so it can be seen by the controller:
sudo bluetoothctl
discoverable on
agent on
If you cannot run
bluetoothctl you may be running an older version of Jessie and might need to install the old Bluetooth module using:
sudo apt-get -y install bluetooth after which you should restart the Raspberry Pi and try again.Now you can press the PS button on the controller and it should attempt to talk to the Raspberry Pi.
You should see some log lines like this at a regular interval:
[NEW] Device 38:C0:96:5C:C6:60 38-C0-96-5C-C6-60
[CHG] Device 38:C0:96:5C:C6:60 Connected: no
[DEL] Device 38:C0:96:5C:C6:60 38-C0-96-5C-C6-60
You will need to make a note of the MAC address displayed, it is the sequence with '
:' symbols.In this example it is
38:C0:96:5C:C6:60With this we can attempt to make contact with the controller.
We need to use the
connect command with the MAC address shown, in our example:connect 38:C0:96:5C:C6:60You are trying to get the Bluetooth to try a connection and get a UUID number.
This may take several attempts, you can repeat the command using ? then ENTER.
When it works you should see something like this:
Attempting to connect to 38:C0:96:5C:C6:60
[CHG] Device 38:C0:96:5C:C6:60 Modalias: usb:v054Cp0268d0100
[CHG] Device 38:C0:96:5C:C6:60 UUIDs:
        00001124-0000-1000-8000-00805f9b34fb
        00001200-0000-1000-8000-00805f9b34fb
Failed to connect: org.bluez.Error.Failed
If the controller stops trying to connect press the PS button again before using the connect command again.Once we have seen the UUID values we can use the
trust command to allow the controller to connect on its own.Use the
trust command with the MAC address from earlier, in our example:trust 38:C0:96:5C:C6:60If everything went well you should see something like:
[CHG] Device 38:C0:96:5C:C6:60 Trusted: yes
Changing 38:C0:96:5C:C6:60 trust succeeded
Finally exit the Bluetooth configuration tool and restart the Raspberry Pi.
quit
sudo reboot
Once you have logged back in press the PS button to test the connection.
The LEDs should briefly flash, then just one LED should remain lit.
You can then use the following command to list the connected joysticks:
ls /dev/input/js*At least one should be shown, probably
/dev/input/js0.Finally you can test the PS3 controller is working using the device name from the last command with
jstest:jstest /dev/input/js0The numbers shown should change as you move the joysticks around, if so everything is working properly.
Setup for Wheezy
First you need to get yourself a USB Bluetooth dongle for the Raspberry Pi and you will need a USB mini cable, the same type you use to charge the PS3 controller.Next you will need to setup some software to talk with the PS3 controller, we recommend using QtSixA, also known as sixad.
In order to set QtSixA up properly we recommend following this guide by Raspians.
Alternatively the following commands should download all of the necessary software:
cd ~
sudo apt-get -y install bluez-utils bluez-compat bluez-hcidump checkinstall
sudo apt-get -y install libusb-dev libbluetooth-dev joystick pyqt4-dev-tools
sudo apt-get -y install libjack-dev
wget http://www.pabr.org/sixlinux/sixpair.c
gcc -o sixpair sixpair.c -lusb
wget http://sourceforge.net/projects/qtsixa/files/QtSixA%201.5.1/QtSixA-1.5.1-src.tar.gz
tar xfvz QtSixA-1.5.1-src.tar.gz
cd QtSixA-1.5.1/sixad
make
sudo mkdir -p /var/lib/sixad/profiles
sudo checkinstall
You can then pair a PS3 remote using the following sequence:
- Attach the Bluetooth module to the Raspberry Pi
- Using a USB mini cable attach the PS3 remote to the Raspberry Pi as well
- Run the following command to pair the remote:
sudo ~/sixpair - Once the PS3 remote has paired disconnect it from the USB cable
- You should now be able to test it works using the following command:
sudo sixad --start &
then push the PS button when prompted
Note that the controller may not vibrate with certain versions of Raspbian, if it does not vibrate when you reach the
sudo sixad --start instruction check the screen says it has seen a controller and use the following instruction to test the controller:jstest /dev/input/js0You can press CTRL+C to finish either of the above instructions, the PS3 controller will remain connected if it has been connected successfully.
If you wiggle one of the analogue sticks up and down you should see output like:

Values for scripts
Now that we have a working PS3 controller we will want to make our scripts work with it, but there are a large number of axes and buttons on the controller, so which is which?The table below shows each control with the associated index numbers for behaviour as a button (on or off) and as an axes (numeric position).
Any box filled with
--- means the associated action does not have an index, for example moving the left stick up does not have a button index.For left / right movement of sticks the value read is
-1 for fully left, 0 for central, and +1 for fully right.For up / down movement of sticks the value read is
-1 for fully up, 0 for central, and +1 for fully down.For buttons / D-Pad with an axis index reading as an axis returns
-1 for not pressed, between -1 and +1 when pressed partially (larger number is harder pressed), and +1 for fully pressed.If you are not seeing any axis readings for the buttons or the tilt function it is probably because the QtSixA program has not been left running, the best way to start it from a terminal is:
sudo sixad --start &The "
&" symbol tells Linux to keep the program running in the background but give you control of the terminal back (lets you keep typing commands).0 |
--- |
|
1 |
--- |
|
--- |
1 |
|
2 |
--- |
|
3 |
--- |
|
--- |
2 |
|
11 |
7 |
|
9 |
5 |
|
8 |
4 |
|
10 |
6 |
|
19 |
15 |
|
16 |
12 |
|
17 |
13 |
|
18 |
14 |
|
14 |
10 |
|
12 |
8 |
|
15 |
11 |
|
13 |
9 |
|
--- |
0 |
|
--- |
3 |
|
--- |
16 |
|
5 |
--- |
|
4 |
--- |
|
6 |
--- |


